Introduction
Although the content of the document is the most important element, Word offers you several options to improve the presentation of the text. In this page, you will learn the various options that are generally used for presentations.These options are generally used to draw attention to certain part of the text: bold, italic, underline, the font, the arowment, to center a title or change the color of a page.
The text of the presentation can be modified at anytime during or after it as been edited.It's always possible to you to activate or to deactivate an option as you are working on the presentation or after reviewing. For example, you can press the button
During the period of revision, it is still possible to improve the presentation of the text. It's however necessary to make a block, or to select, the part of the text that you want to change. To modify the presentation of the entire text, it is easier to use the Select all option from the Edit menu. Once selected you can activate or deactivate the option of presentation of your choice.
Text presentation
This section is to explain the possibilities that you can use to improve the presentation of your document. You can use the toolbar "format" or the options for the fonts that you'll find under the menu Format.The "format" toolbar below, allows you to reach the options most frequently used.
The first option of the bar is to paste a style of presentation. You can use it, to mark down the parts, the chapters or the subjects of your document. You can also use them, to create and update automatically a table of contents.
Windows offers you, in all of it's applications, the access to several fonts. Every font is a style of presentation for the characters of your text. Some are created for formal letters, the others to accentuate a title and the others are simply created for fun. Here is a small example.
The following box shows the name of the font that is presently available. To see the list of fonts, press the small triangle pointing down in the right-hand side of the name of the font. A similar list will appear.
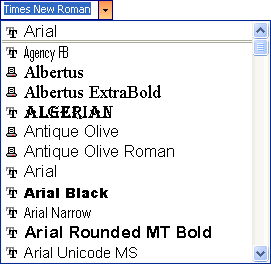
It's also possible to control the size of the font chosen. They can be as big or as small as you wish. The size of the characters is calculated in "points", that is 1/72 of an inch. The more the figure is big, the more the character eill be. You can choose the size of a font from 1 to 1638 points.
It is easy to activate and to deactivate the options for the bold
The next four buttons control the adaptation of the rows of text with regard to the margins of your document.
It is even possible to change the color of the text thanks to a button that meets itself on the toolbar "drawing". The button allows to apply or to change the color of the text.
You can modifythe the options of the text at anytime.
While writing the text, you can activate or deactivate one or more options. Once activated/deactivated the text written after the change will use the new options. For example, to write the text in bold, it's enough...
Even after the review of the text, you may change the options of presentations. It is however necessary to make a block with the of the text you wishe to modify before changing the options.
This block can be a letter, a word, a sentence, a paragraph or even several pages. To change the presentation of the entire document at once, use the Edit menu and the option Select everything.
Toolbars offer you the options most often used, but not all the options.
This dialog box offers you all the options to manipulate the presentation of your text. Since, there are alot of options to chose from. They are seperated in three categories: " Fonts, styles and attributes ", "Spacing" and "Animation". Most of these options, you will find under the first tab: " Font, style and attributes ".
You may change the font, the size and several other attributes such as the background, to add one shadow, to put in indication (low of the row) or by exposing(explaining) (height of the row) etc. In the lower corner, you have a preview of the result before applying it to the text of your document.
It is also possible to control the space between the characters. You can enlarge it or reduce it. This can be practical for words such as workforce or letters " oe " are generally stuck. This can be also practical to enlarge the space between the letters of a title.
The last tab is to put a little fun in your document. You can activate the animation of a characters of your choice. Word offers you some possibilities for the animation. They are however not practical when a document must be handed in on paper only.
Justification or paragraph alignment
In the right-hand side of three buttons for the bold, the italic and the underlined, there are four buttons for the justification of rows. Or rather, how a row will be arowd with regard to the margins of the page.The adaptation to the left is the option that we are the most accustomed to. The text of the paragraph is stuck on the left margin of the page but not that of the right-hand side.
The centered adaptation will center the text perfectly between the right and left margin of the page.
The right adaptation will put the text on the right margin of the page. This is practical to place a date of an official letter on the right border of the page.
What Word calls "to justify", consists in the justification or the right left adaptation, the text is arowd on the left margin as well as the right margin. This is very often used for a formal letter. There is however a small trap. By proving, to give you the right for Word a little to enlarge spaces between the words to make sure that the last word of the row pastes on the right margin of the page. It leaves spaces a little bigger than is in usually.
Here is an example of the four possible adaptations according to the order of the buttons: left, centered and justified, straight ahead.
To change the adaptation or the justification of a row.
To align a paragraph, a page or a part of your document.
Tabs
A tab serves for aligning words on some rows of the text. It is very practical to align words for a list or for a resume. For example.| Name | First name | Occupation |
| Lepage | Roger | Manager |
| Lambert | Denis | Salesperson |
| Lavigueur | Denise | Salesperson |
| Manager | Take charge of the management of the staff. Manage the budget of the office or its department Communicate with the departments... |
Previously, as a typist, it was easy to align a text. It was enough, to put the number of necessary spaces to align a text. This is not true any more for computers and especially word processors. Under Windows, there are two kinds of fonts; those of fixed size and those of flexible size.
The characters of fixed sizes take all the same space. So a " i " takes as much space as a " w ". Here are two examples with the words "piano" and "car". Both consist of five letters. Furthermore, three of the letters you will find in both words.
For a font of fixed size such as Courier New in a size of 10 points (1/72 of an inch), both words take as much space.
But, for a font of flexible size such as Times New Roman in 10 points, the word "Wagon" takes more space.
It's almost impossible to align perfectly of a text that uses fonts of flexible sizes. Nevertheless, the majority of the fonts that you will find in Windows are of this category. It is for that reason that it is necessary to forget the use of the space to align a text. Use instead the tabs to align a text.
On the keyboard, to the left of the letter " Q ", you will find the key of the tabs. Normally, there are on the keyboard two horizontal arrows pointing in opposite direction(management). You can use the "normal" tabs that take place in every 1,25 cms. But it is also possible to place the tabs with the use of the ruler. THey will then be of the place of you're chosing.
To the left of the ruler, there is a button that allows you to choose among four type of possible tabs. It's enough to press button to pass from a type of tab to another.
Note:
Word 2000 possesses 5 tabs (tab steers in more) and indents.
| left tab | The tab will allow to write the text to the left of this one. | |
| Centred tab | The text will be centered on the tab instead of the centre of the page. | |
| right tab | The tab will allow to write the text in the right-hand side of this one. | |
| Decimal tab | The tab will allow to align numbers on the decimal point. | |
| Bar tab | ||
| First row indent | ||
| Hanging indent |
The following screen will appear.
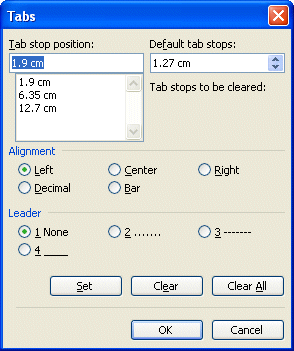
This window shows you that tabs are availlable at every 1,25 as well as in position of 3,5 cms and 5,5 cms from the left margin of your document. It is possible to modify the type of tabs (5 types), their place at any time. You can add or remove so many tabs as you want.
Exercise of tabs
Your cursor is now on the next row. But the tabs that you have just installed will apply to this new row. You will notice as well that the text potatoes is centred on the tab.
Once you have finished the list, it is necessary to remove the tabs. You can them from the menu Format, tab, or with the ruler.
To remove one tabs from the ruler:
Borders and shading
Add a border to a cell
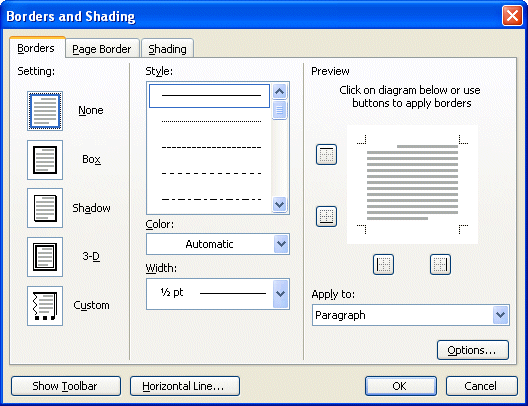
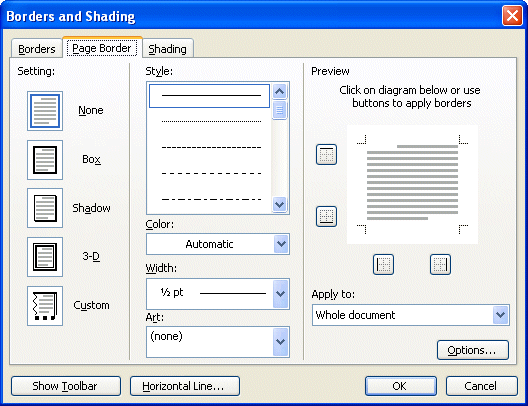
There are two ways to add rows of your choice to a table: by using the option Border and left of the Format menu or by using the toolbar Borders. By using either one of these techniques, you can not only add rows to a table, but also add a border to the document.For the next exercise, we will use the toolbar Borders to put a row around the table. Before we begin, make sure that the toolbar is available. If you do not see the toolbar such as shown below, go to View, Toolbar, and activate the toolbar Borders.
If this new toolbar is on your text, you can always move it. Place the cursor on the title bar of the window; in this case, the blue bar over the buttons. Keep your finger pressed on the left mouse button and move toolbar to the place of you're choice; upward, to the bottom or on either sides of the screen. Release the mouse button once you have chosen the location that suites you. You can move any toolbar this way.
The following exercise consists of putting a row around a table. In the first place, it is necessary to select the cells that you want to put a border around. Make sure that you select the cells of the table and not the rows of the text that are above or below the table. Otherwise, part of the text wil have a border.
You must then choose the type of row that you require. Of the first list, press the downward arrow located beside the button. You will then have the completes list of available types of rows that you can choose from. Select the one that is convenient for you. The buttons on the right-hand side determine the place where this type of row will be placed. You can choose a border that will appear only, to the left, to the right-hand side of the cell or around the entire table. You also have the option of placing the rows at different places inside the table.
To add a row to the outline of the block of cells, press the button
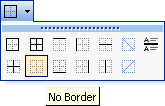 . You can afterward put various sorts of rows in your table or in your text.
 Add color to the backround
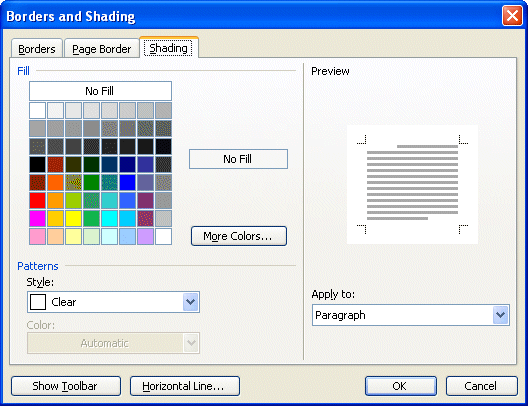
With this option you can change the color of the backround of the text. One uses it, to mark down titles or text mattering besides of the document. You can use the button on the left of the toolbar Borders. However we will use the option Format, Borders and shading for the next exercise.By using the last mentioned option, a new window opens.
From the options, you may decide the percentage of grey you wish as well as colors for the backround and the text. The window in the lower right corner will give you an example of you're choice. It's generally recommended not to use a pourcentage or more than 10% of grey as the text will be more difficult to read.
For the next example, put the thorough percentage in 100 %. This will have the automatic effect of changing the color of the bottom to the black and the text in the white color. You can also change the colors. The effect should look like this:
No comments:
Post a Comment